Laser measures: quick reference guide
This quick reference guide is for internal use only by employees of the Municipal Property Assessment Corporation (MPAC). If a lost device is found, please contact MPAC’s Customer Care Centre at 1-866-296-6722, Monday to Friday, between 8 a.m. and 5 p.m. ET.
MPAC’s laser measure device is the Leica Disto™ X4 (the “device”) and is used to capture accurate property measurements. The device is easy to use, lightweight, portable, accurate and efficient. This quick reference guide includes information on some of the most common inquiries regarding the device. Employees looking for more information on the device can visit myMPAC or contact their designated VCR Subject Matter Expert.


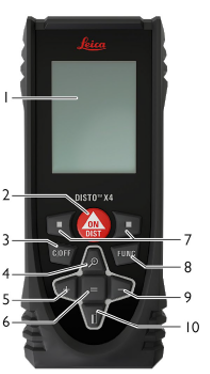
- Display
- ON / Measure
- Clear / OFF
- Zoom / Navigate Up
- Add / Navigate Left
- Enter / Equals
- Selection Keys
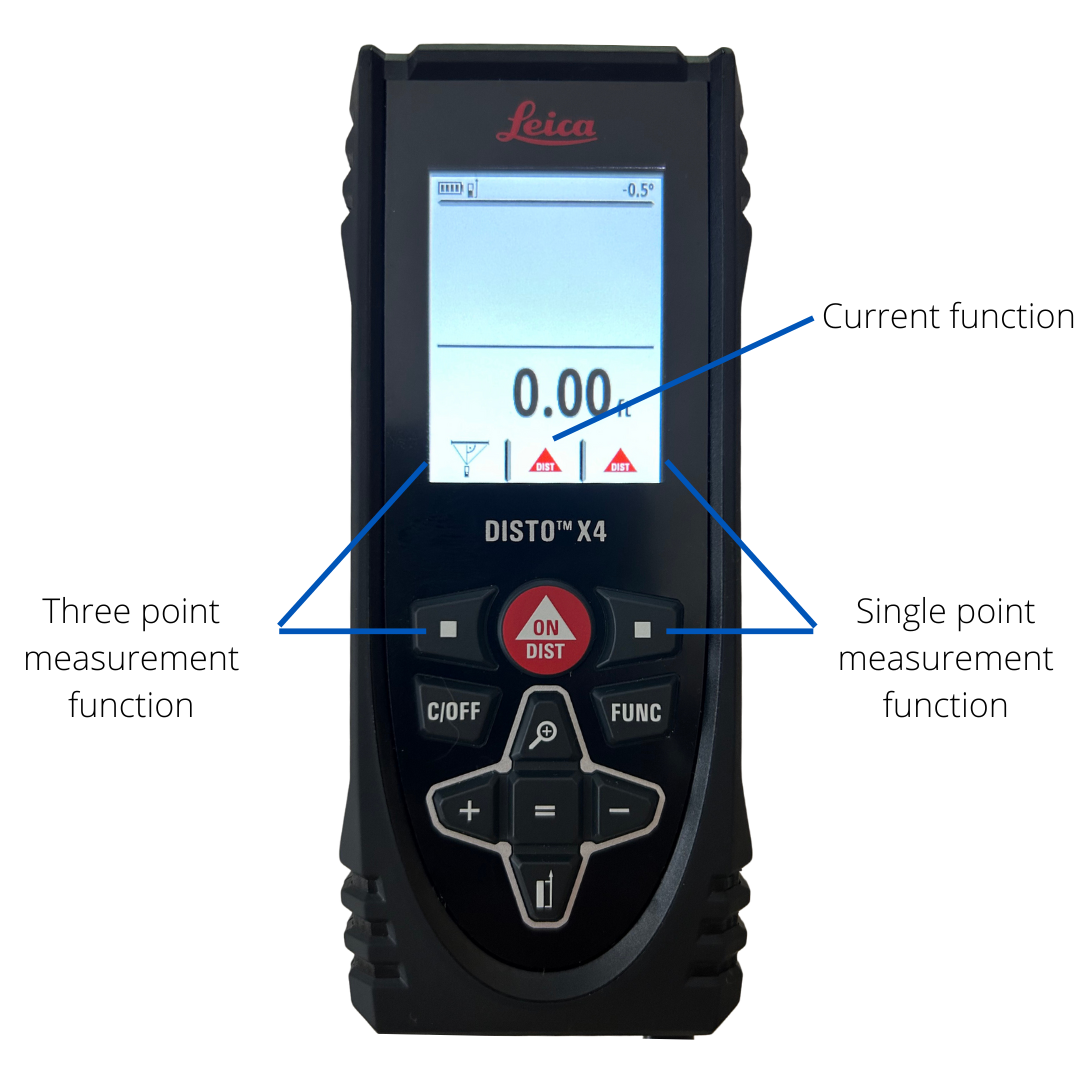
A. Select / Favourite (MPAC pre-set to Three point measurement function)
B. Select / Favourite (MPAC pre-set to Single point measurement function) - Functions
- Subtract / Navigate Right
- Measuring Reference / Navigate Down
- Press the
 (8) button.
 - Press the left
 (7A) button to go to the settings
  menu.
menu. - Navigate to the
 icon and press the
  (6) button to go into the brightness setting.
 - Adjust the brightness level by pressing up (4) or down (10). 6 is the brightest, 1 is the darkest.
- Press the right
 (7B) button to confirm.
- Press the
 (8) button.
 - Press the left
 (7A) button to go to the settings
  menu.
menu. - Navigate to the
 icon on page 1 and press the
  (6) button to go into distance units menu.
 - Navigate to the second page and select 0.00ft unit (MPAC’s unit of measurement).
- Press the right
 (7B) button to confirm.
Video
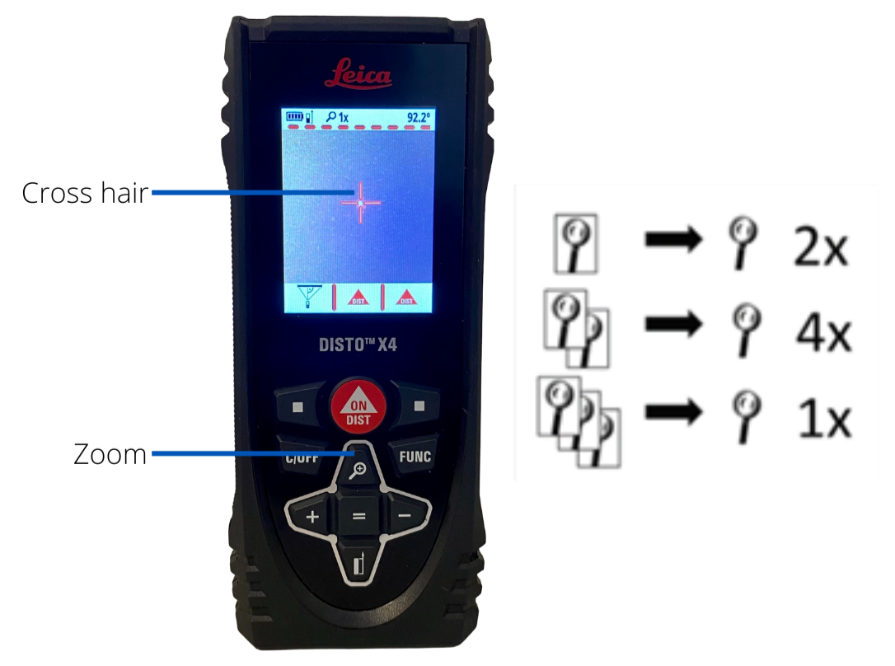
The device has an integrated pointfinder or viewfinder. Use the pointfinder when you are unable to see the red laser dot due to sunlight. The device measures in the middle of the cross hair, even if the laser dot is not visible.
Press the ![]() (4) button once for 2x zoom, twice for 4x zoom and thrice to return to 1x zoom.
(4) button once for 2x zoom, twice for 4x zoom and thrice to return to 1x zoom.

- Press the
 (8) button.
 - Press the left
 (7A) button to go to the settings
  menu.
menu. - Navigate to the
 icon on the second page and press the
  (6) button to go into calibration menu.
 - Lay the device down (horizontal) on a flat surface. Press the red
 button to start calibration and rotate the device 180º. Press the red
  button again.
 - Stand the device up (vertical) on a flat surface. Press the red
 button to start calibration and rotate the device 180º. Press the red
  button again.
 - Once calibration is complete, you'll see a check icon on the screen.
- Press the
 (8) button.
 - Press the left
 (7A) button to go to the settings
  menu.
menu. - Navigate to the star ☆ icon on page 1 and press the
 (6) button to go into favourites menu.
 - Navigate to the function you want to set as a favourite and press the = (6) button to select it.
- Press either the left
 (7A) button or the right
  (7B) button to assign your favourite to that function.
The device has two main functions: 1) Single point measurement and 2) Three point measurement.

Three point measurement function tips:
- Point at all three targets on the same level by using the same row of the brick or vinyl siding.
- Position/ stand at the centre/ middle of the wall.
- The device must be anchored to your chest or abdomen. Do not swing your arms.
- Make sure the angle displayed on the top right of the screen is close to zero.
Code |
Cause |
Correction |
| 156 |
Transverse tilt greater than 10° |
Ensure device is horizontal and flat. Re-measure. |
|
162 |
Calibration error |
Ensure device is horizontal and flat. Re-calibrate. |
|
204 |
Calculation error |
Repeat measurement |
|
252 |
Temp too high |
Let device cool down |
|
253 |
Temp to low |
Warm device up |
|
255 |
Signal too weak |
Change target surface (i.e. white paper) |
|
256 |
Signal too high |
Change target surface (i.e. white paper) |
|
257 |
Too much background light |
Shadow target area |
|
260 |
Laser beam interrupted |
Repeat measurement |
|
301 |
Device was moved |
Level device and measure again |
Video: Customizable options
Video: Battery replacement


